> ## Documentation Index
> Fetch the complete documentation index at: https://comfydeploy.mintlify.site/llms.txt
> Use this file to discover all available pages before exploring further.
# Overview
> Edit your workflow right in the workspace
## Edit your workflow
With any new machine created, you can now access the ComfyUI node graph directly.
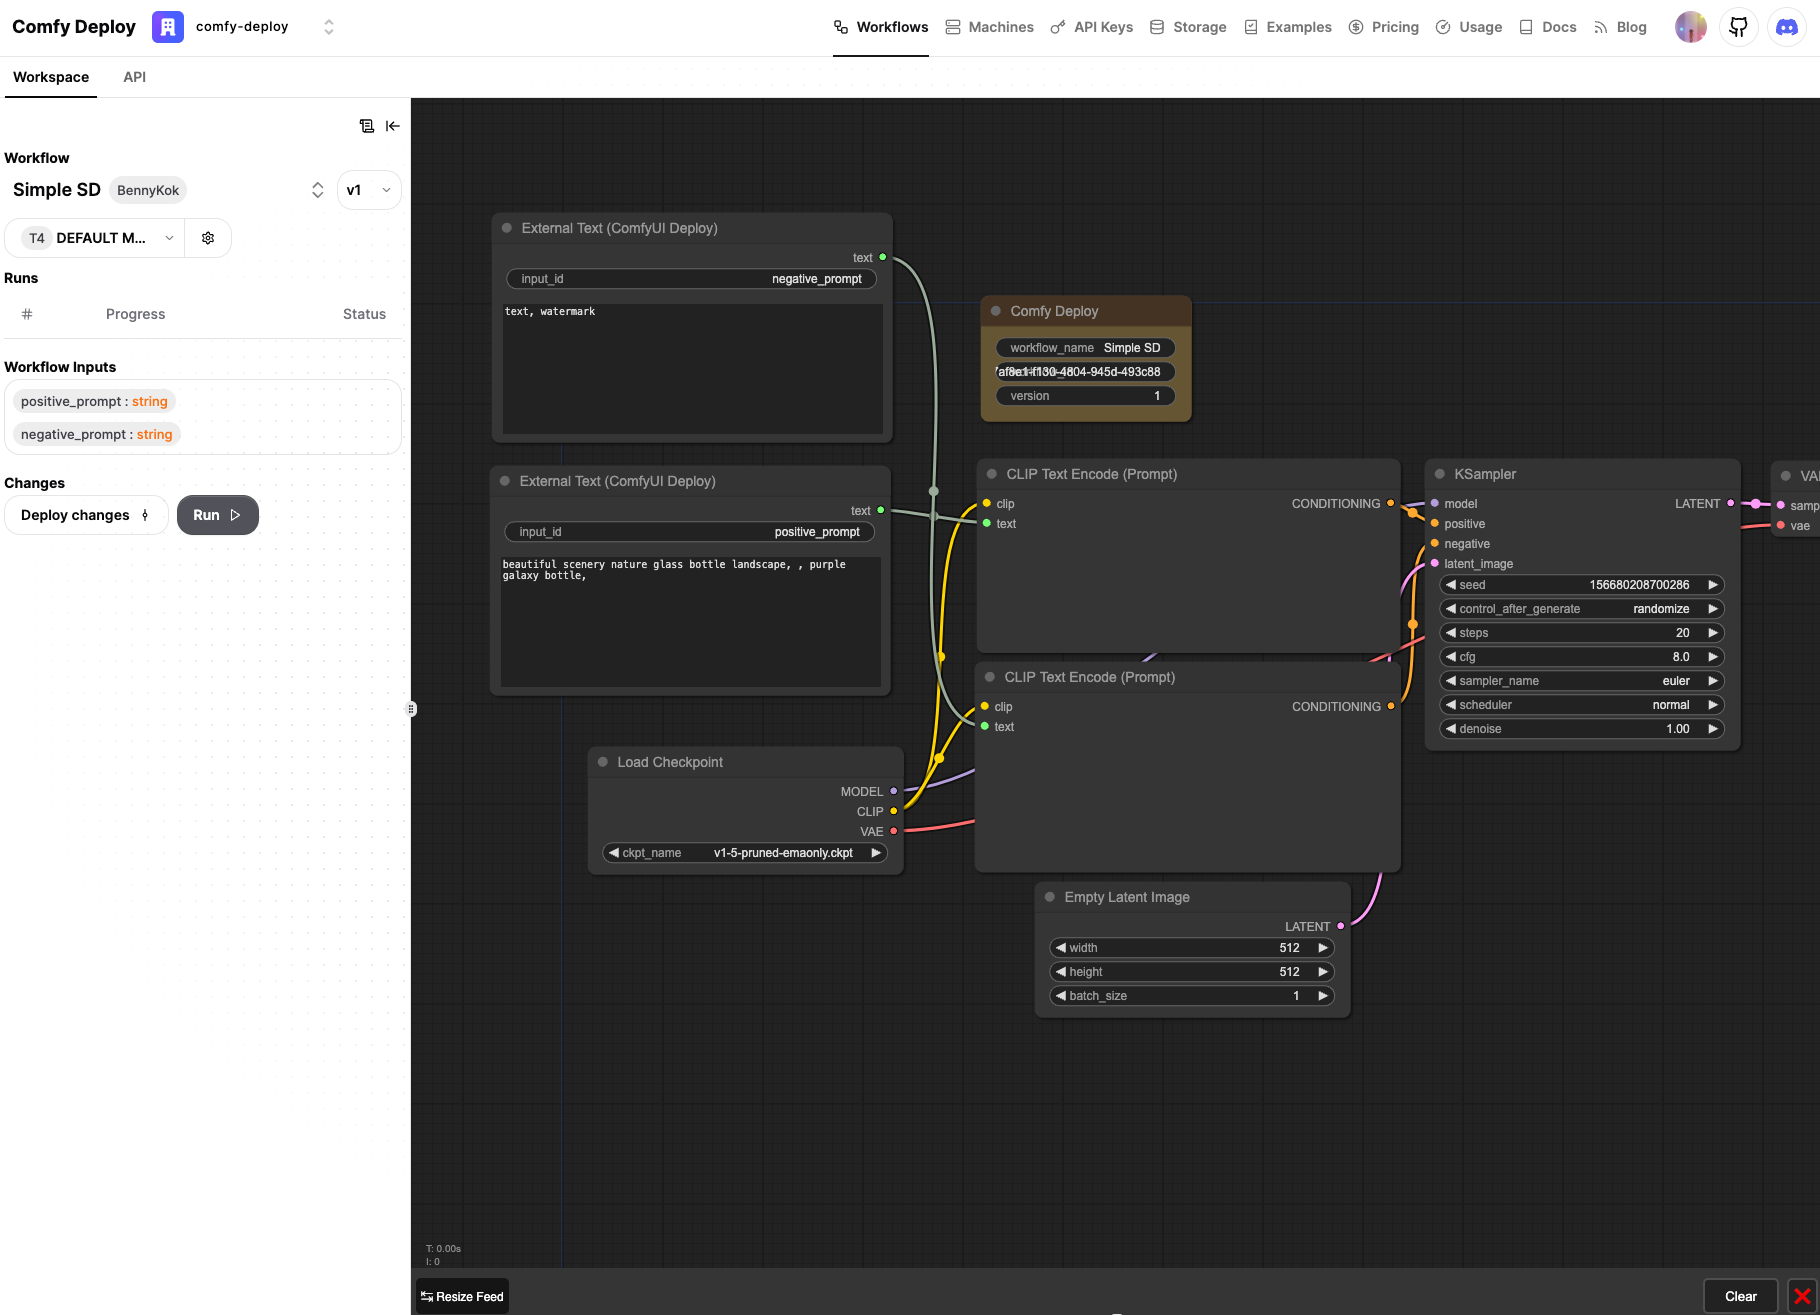 To deploy changes, hit the `Deploy Changes` button right on the left panel.
### Install custom node
To install custom node, head to the machine cog icon,
To deploy changes, hit the `Deploy Changes` button right on the left panel.
### Install custom node
To install custom node, head to the machine cog icon,
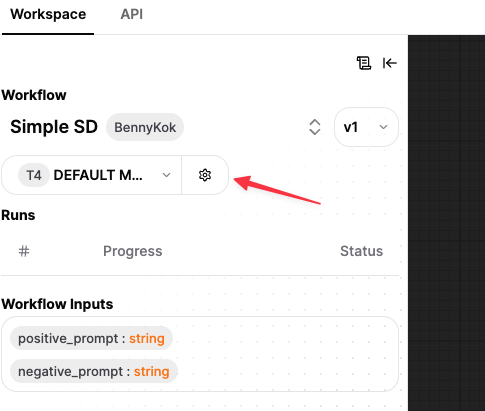 Next, click open Add Custom Node and select your custom node, make sure to save and rebuild the machine.
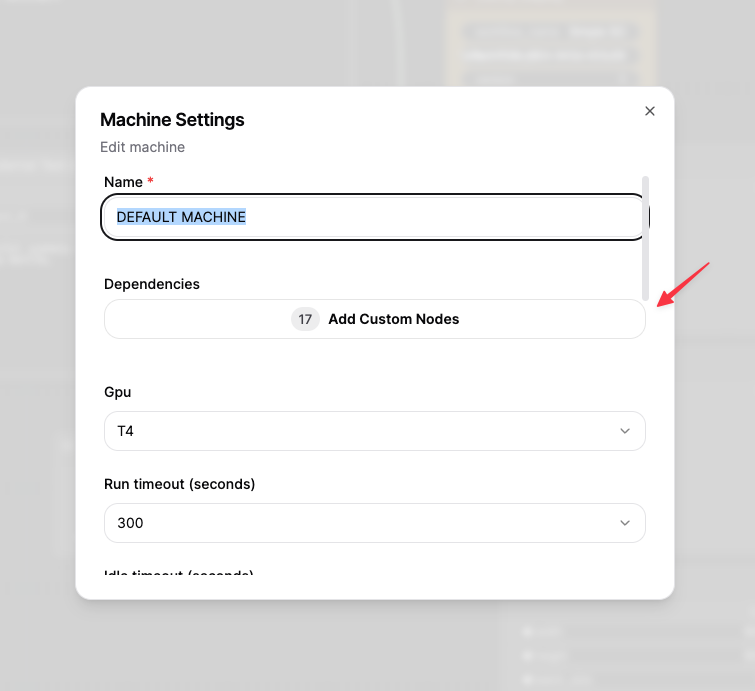 Once the machine has been rebuild, refresh the worksapce to see the latest changes.
### Pro tips
* Any files your uploaded here, will be accessible to your API as well.
* Check and make sure workflow runs well, it will works exactly the same as if you trigger from API.
* Hit ctrl-enter to trigger the run dialog.
Once the machine has been rebuild, refresh the worksapce to see the latest changes.
### Pro tips
* Any files your uploaded here, will be accessible to your API as well.
* Check and make sure workflow runs well, it will works exactly the same as if you trigger from API.
* Hit ctrl-enter to trigger the run dialog.